
Shader Project - Godot

Join the Nuzcraft Newsletter to get posts delivered straight to you!
In October 2023 I got into a weird brainspace where I just had to learn how to make shaders. Let’s gooooo!!! 🏃♂️
What are you even talking about…
While I was working on the Monster Hunter: World Color Randomizer, someone in discord recommended a video on youtube from the graphics programmer Acerola. It was fascinating and I shortly thereafter binged a bunch of their videos. I was drawn to learn some of the ideas and concepts and see if I could apply them in Godot and to my projects.
Around the same time, I either watched or remembered watching a video by Useless Game Dev where they used a variety of shaders to create a really cool ‘moebius’ styled game. I decided to try to break up the moebius shader into smaller bits to really learn how they worked.
Let’s start programming!
The main refernces I used to start learning shaders beyond the videos above, were the advanced post-processing article in the Godot documentation and examples from GodotShaders.com. The documentation is really helpful for understanding some of the foundational stuff necessary to make shaders (and specifically 3d screenspace shaders) work in Godot. GodotShaders has a huge supply of open source shader examples to pull from and disect in order to figure out what you’re doing wrong in your own code.
Edge detection
The first (and most difficult) problem that I tackled was detecting the edges of objects so I could render lines there. Shaders basically take information about the pixels on the screen and use that information to do something else. In this case, I wanted to look at the pixels all around a specific pixel and use the 3x3 box of pixels to decide whether there was an edge at the center pixel or not.
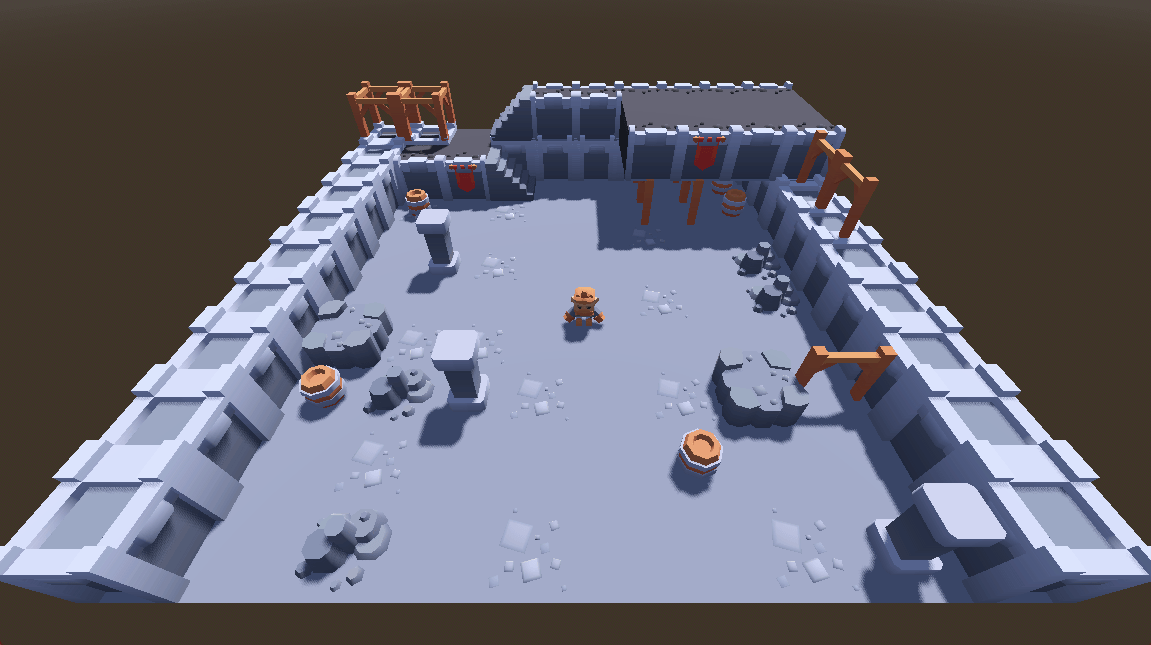
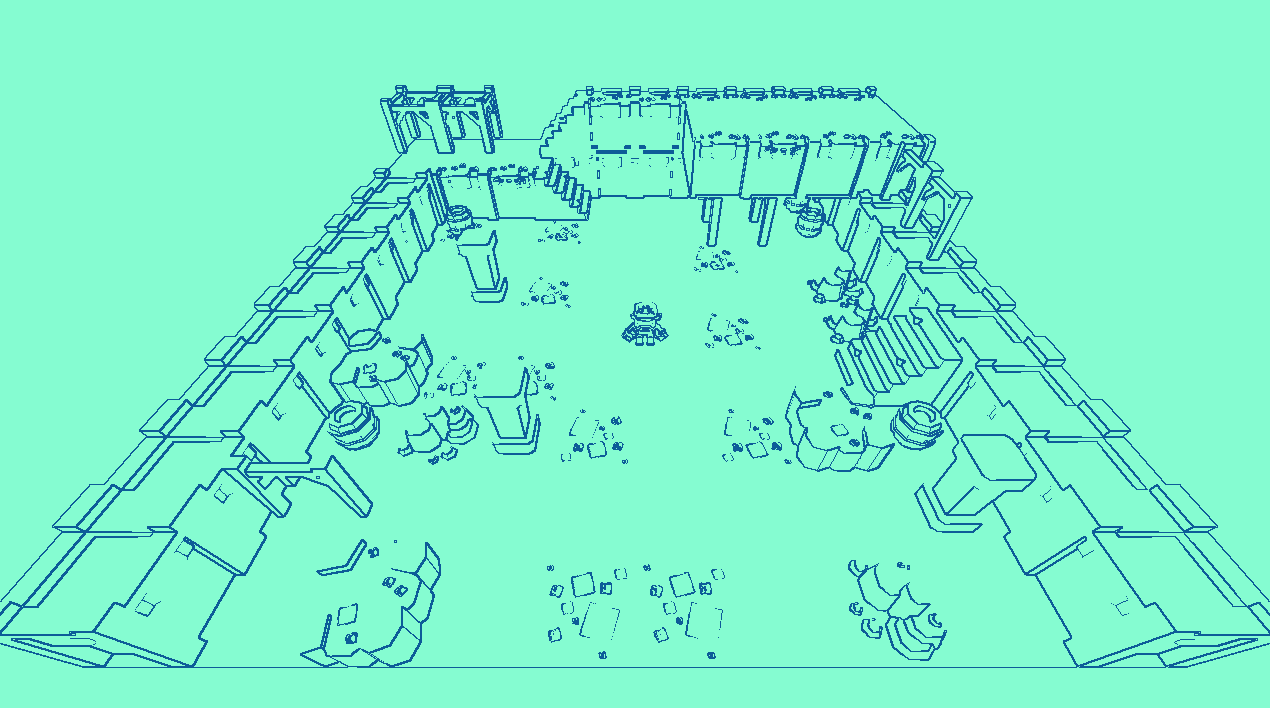
I started by building test scene that I could use to see how my shaders were working. Shout out to Kenney for their amazing free asset library!
Depth-based edge detection
- For each pixel, figure out how far away the object it’s rendering is from the camera
- Do the same for each of the 8 surrounding pixels
- Calculate the dot product of the matrix of depth values with the horizontal and vertical Sobel Operators
- The sobel operator will accentuate any differences in depth across the horizontal and vertical mid-line of the 3x3 group of pixels
- The result is a decimal where a higher value is more likely to be an edge
- Re-color all the edge pixels in one color and all the non-edge pixels with a different color
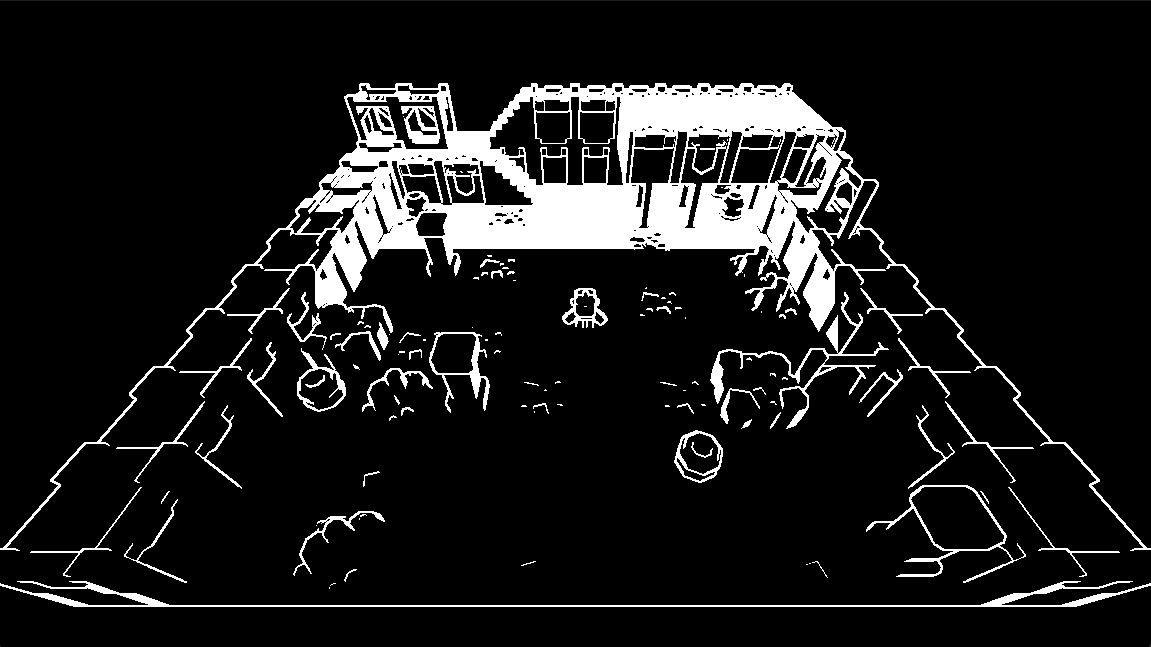
I loved getting this shader up and running 😎. It’s a great first pass at edge detection, with a couple obvious issues.
- Corners and floor meetings are lost
- at corners, there’s an obvious change in the geometry, but the distance from the camera doesn’t really change.
- We’ll address this in the next example.
- Floors and walls are all edges far from the camera
- due to the perspective of the camera, theres an exponential increase in the distance from the camera for each pixel as you approach the horizon line.
- We’ll address this in the next example.
If you’re interested in the intricate workings of this particular shader, please check out the full writeup on the source repository: Depth Based Edge Detection with Sobel Operator Write-Up
The shader code was also uploaded to GodotShaders so that anyone who’s interested can learn a bit more about how it works. The link to that is here: Depth Based Edge Detection with Sobel Operator Shader Code
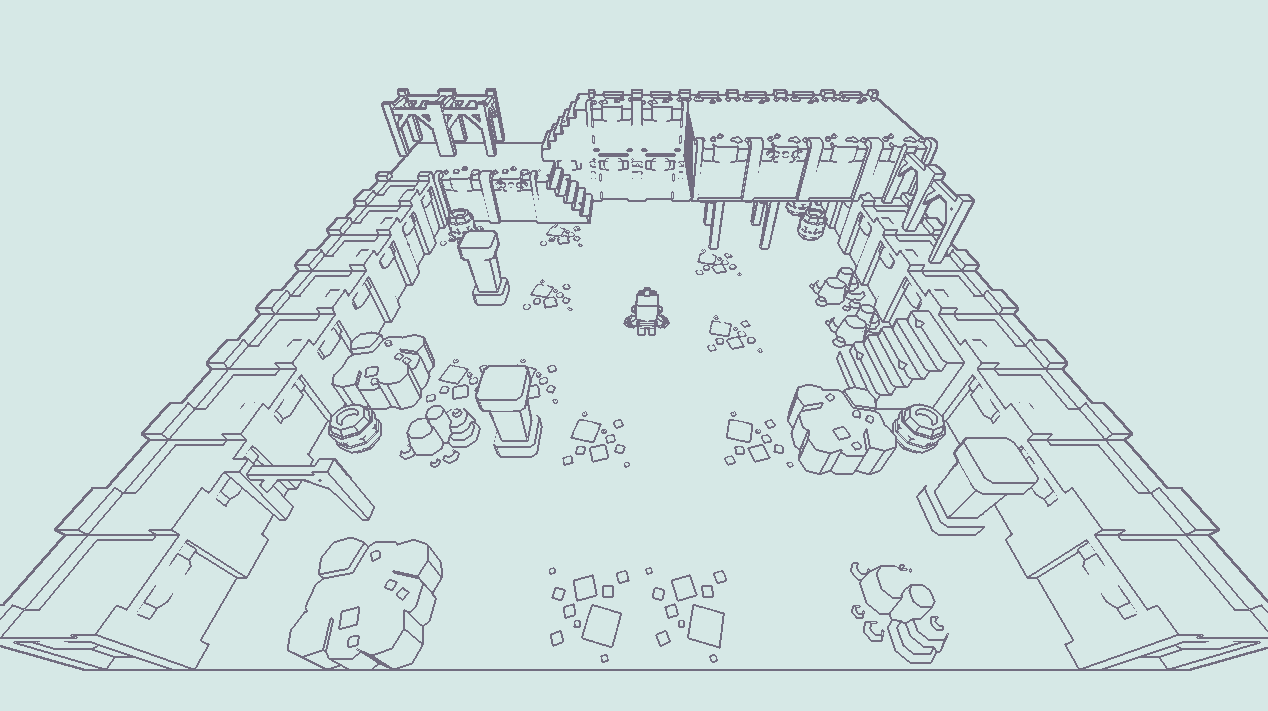
Normal-based edge detection
In this next example, we’ll use normal vectors to help us find edges. The normal vector is basically an arrow that points perpendicular to a surface; the normal of a floor would point straight up and the normal of a wall would point sideways.
- For each pixel, find the normal vector
- Do the same for each of the surrounding pixels
- Calculate the difference between the surrounding pixel normals and the center pixel normal
- Calculate the dot product of the matrix of normal difference values with the horizontal and vertical Sobel Operators
- The sobel operator will accentuate any differences in normals across the horizontal and vertical mid-line of the 3x3 group of pixels
- The result is a decimal where a higher value is more likely to be an edge
- Re-color all the edge pixels in one color and all the non-edge pixels with a different color
This method solves the issues we saw from the depth-based method!
- We can see corners where a wall meets a floor!
- We don’t see a swath of ‘edge’ as we approach the horizon!
But, this method still has a big issue
- Edges aren’t detected when 2 objects at different heights have the same normal
- a box on the floor; both have flat tops with the same normal, so a perspective view can’t tell the difference between the top of the box and the floor
Check out the full writeup on the source repository: Normal Based Edge Detection with Sobel Operator Write-Up
The link to the code on GodotShaders: Normal Based Edge Detection with Sobel Operator Shader Code
BY THE POWERS COMBINED!
By combining the depth and normal methods into a single shader, we get a reasonably good pass at edge detection without the issues we were seeing before!
Wiggle Shader
One of the features from Useless Game Dev’s video is that he added an uneveness to the outlines to give it more of a hand-drawn look. There are A TON of ways to approach this problem, but I’ll detail my approach. The final product is an animated shader even though the use case presented probably would have kept it static and a lot more subtle.
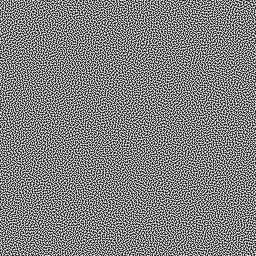
- Create or download a noise texture
- I used a ‘blue noise’ texture that I downloaded from the internet. You can see it below. ‘Blue noise’ tends to be more regular than true random noise.
- Place the noise over the screen and animate it so that it slowly moves in a direction
- this could be turned off if you don’t want a moving wiggle
- For each pixel of your screen, get the coordinates (also called the uv)
- Generate an offset based on how dark or light the noise texture is at the same coordinates and add that offset to the pixel coordinates
- replace the pixel with the pixel from the offset coordinates
Check out the full writeup on the source repository: Noise Offset Shader Write-Up
The link to the code on GodotShaders: Noise Offset / Wiggle Shader Code
Cross-Hatch and Dither Shader
Moving into new territory, I dipped my toes into creating a cross hatch shadow shader similar to the one seen in Useless Game Dev’s video (spoiler, it doesn’t quite work out like I want). One of the great references I used was SamBigos’ Dither Gradient Shader.
I’d encourage you to take a look at the code, it’s very cool.
- import a texture to use for dithering
- in my example, I used the same blue noise as before
- import a color palette image
- in my example, I used just 2 colors
- for each pixel, calculate the luminosity based on the r,g,b values
- link the luminosity to the palette so that ‘darker’ pixels line up with one end and ‘lighter’ pixels line up on the other.
- sample the dither texture, use it to set the pixel to one of the two colors linked to the luminosity
There are a lot more complexities around setting up the color bands.
Cross the Hatches
I took some of the ideas from the dither shader and used them to try to make my own cross hatch shader. Since I was specifically going for a 2-tone cross hatch, I could ditch a lot of the complexities that came with working with the color palette.
Your first thought: ‘WOW THAT’S BAD!’
And, you’re right! But the way it works is kinda cool
- import 3 textures to use for cross hatching, one horizontal, one vertical, one diagonal
- you can probably combine these into a single texture in the r,g,b channels, then separate the channels out in the shader. I couldn’t quite get this working.
- for each pixel, calculate the luminosity based on the r,g,b values
- at different luminosity levels, add in more layers of cross hatching by sampling the imported textures
- at luminance less that 75%, add in one hash
- at luminance less than 50% add in another
- at luminance less than 25% add in the 3rd so that all 3 are present
- color everything else the background color
I didn’t really finish this shader, or really feel good about it, so I don’t have a full write-up like the previous ones. You can find the shader code here, on the repository. I think the biggest issue is the quality of the hatching textures; with some high-quality, tileable hash images, I think this could look presentable.
Unga-Dungeon, the Shader Project
The complete source code for this shader project is available here: Unga-Dungeon. It was originally going to be a dungeon crawler for a game jam, but pivoted quickly to a vessel of learning. It’s not a well documented repo, sorry 😎.
The project is set up to demo each of the shaders discussed above with a control box of toggles.
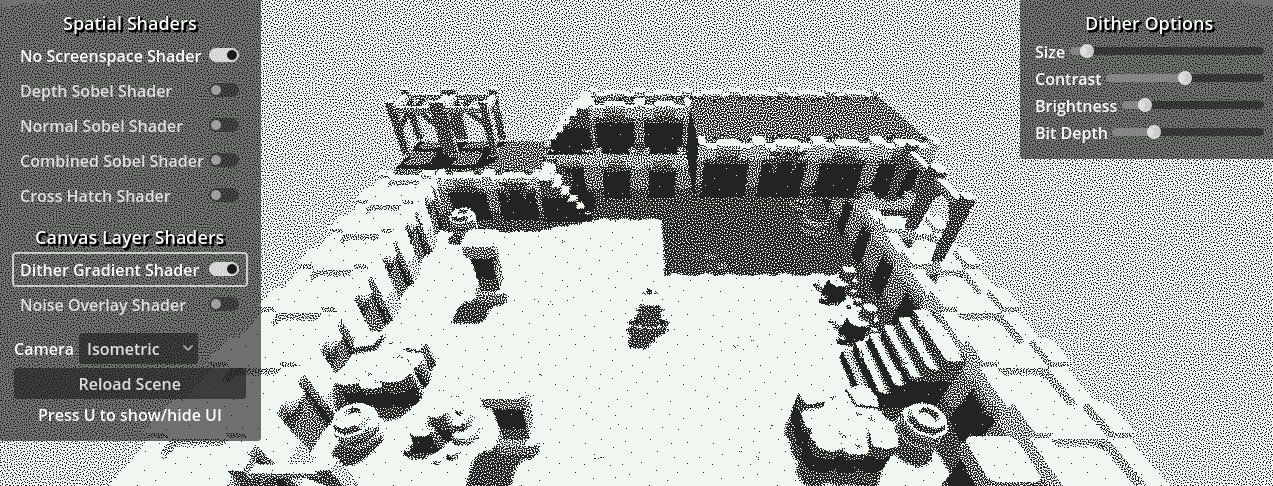
- Spatial Shaders can be toggled on one at a time
- Godot has a backbuffer node that it sounds like you can use to combine multiple spatial shaders. I did not get this working.
- Canvas Layer shaders can be toggled on at will.
- The Cross-hatching and Dither shaders have extra settings to mess with
- contrast and brightness are a lot more important in these shaders since we use the colors to calculate luminosity
- there is an orthographic projection camera option for a side view
- this is a fine way to see how your shader looks without perspective and some of the issues that come with it
- finally, a shortcut to hide the UI, to make screenshots easier 😎
Conclusion
I learned a lot about shaders over the course of this project. I’m nowhere near an expert, but I feel I can confidently work with shaders in my projects and I have the tools to puzzle out whatever issues might come up.
Thank you for reading! Feel free to reach out if you have any questions!
Mastodon - https://mastodon.gamedev.place/@nuzcraft
Email - me [at] nuzcraft.com
Join the Nuzcraft Newsletter to get posts delivered straight to you!