Debugging Procedural Generation

Debugging Procedural Generation
Over the past couple weeks I’ve been focused on getting some baseline procedural map generation into the project along with some debugging tools. Today we’ll dig into how the current iteration is looking as well as a peek ahead at where the project is heading.
But first, please consider subscribing to my newsletter, either with the substack link below or with the RSS feed for this blog. I’m excited to share my game development journey with you.

Maps and Tiles
In the last devlog, I prototyped the map by creating Map objects that would hold an array of Tile objects that would each have a TileType. I have since expanded on that a bit, but that core remains.
# tile_type.gd
extends Resource
class_name TileType

@export var name: String
@export var walkable: bool

# tile.gd
extends Resource
class_name Tile

var position: Vector2
var tile_type: TileType
var flavor: String = ""

# map.gd
extends Resource
class_name Map

var size: Vector2
var tiles: Array
var hero_spawn_location: Vector2
var creature_spawn_locations: Array[Vector2]
At the highest level, Maps are functionally the same. I added some additional references for hero and creature spawn locations as I want these to be stored at the Map level.
Tiles are also the same with an additional ‘flavor’ property that I’ll explain later. In simple terms, I’m using the ‘flavor’ as a descriptor that doesn’t affect the tile type, but can affect how it’s rendered.
TileType properties are now being exposed via the @export decorator and we’re no longer storing the index associated with rendering the tile in the TileType. This allows me to do 2 main things: I can reify different TileTypes as resource files and I can move the tile rendering functionality to its own class, the TileRenderMap class.
extends Resource
class_name TileRenderMap

@export var render_atlas_mapping: Dictionary[String, Vector2]
@export var render_color_mapping: Dictionary[String, Color]
The idea is to link the TileType to a specific rendering with the atlas position in the tileset as well as the color of the sprite. While writing this, I realize it’s possible that the TileRenderMap should also store a reference to the Tileset itself since these properties are so closely tied to the Tileset in use. Similar to TileType, I can reify a TileRenderMap into a resource file and store different versions of render mappings that I might need in different situations.
NOTE: editing dictionary properties in resource files is awful, so I plan to try making that easier with some external file loading
Procedural Generation
My first pass at procedural generation is intended to be temporary, and is based on my first introduction to procedural generation from the roguelike tutorial using python and libtcod. It involves generating some number of rooms within the map, then connecting them with corridors. I chose this method because it’s relatively straightforward to implement and since I don’t really want the implementation in my game, I can focus on making sure the map generation and map objects are modular enough to be used in future different procedural generation techniques.

Debugging Proc Gen
I know from previous experience working with procedural generation that it can be difficult to review/debug procedural generation outputs. The logic involved with procedural generations has bits of randomness scattered throughout and ironing out where specific generation steps start and stop can be challenging if you’re only looking at the end result.
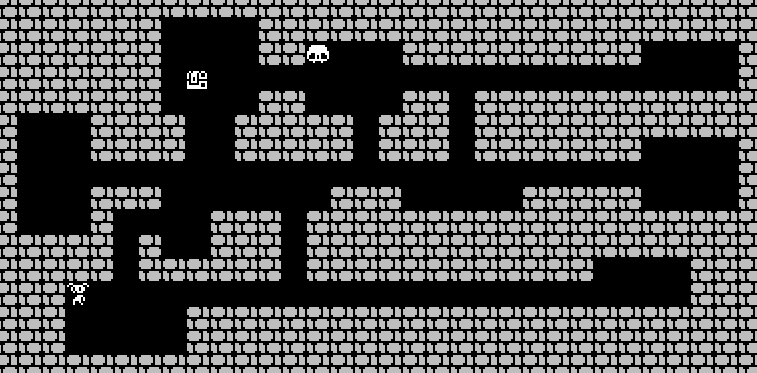
My goal was to create a map gen debug mode that would allow me to toggle between the different generation steps. You can see the first draft above:
- fill the whole map with walls
- carve out rooms
- connect the rooms with corridors
I accomplished this with two main improvements: a state machine to handle inputs and changing the map generator to return an array of Maps instead of just one.
State Machine
The state machine is relatively straightforward. I set up an enum to handle potential states and check which state I’m in for each game loop. Depending on the state, I can handle inputs and rendering differently.
main.gd
enum STATE {
	PLAYING,
	DEBUG_MAP_GEN
}
var current_state = STATE.PLAYING

func _process(delta: float) -> void:
    match current_state:
        STATE.PLAYING:
            # play the game like normal
        STATE.DEBUG_MAP_GEN:
            # zoom out, render in debug mode
            # and handle controls differently
With this setup, I can freely toggle between the states. And since all of the debug rendering and controls can live behind the debug state, I can make changes and tweaks without affecting how the rest of the game functions.

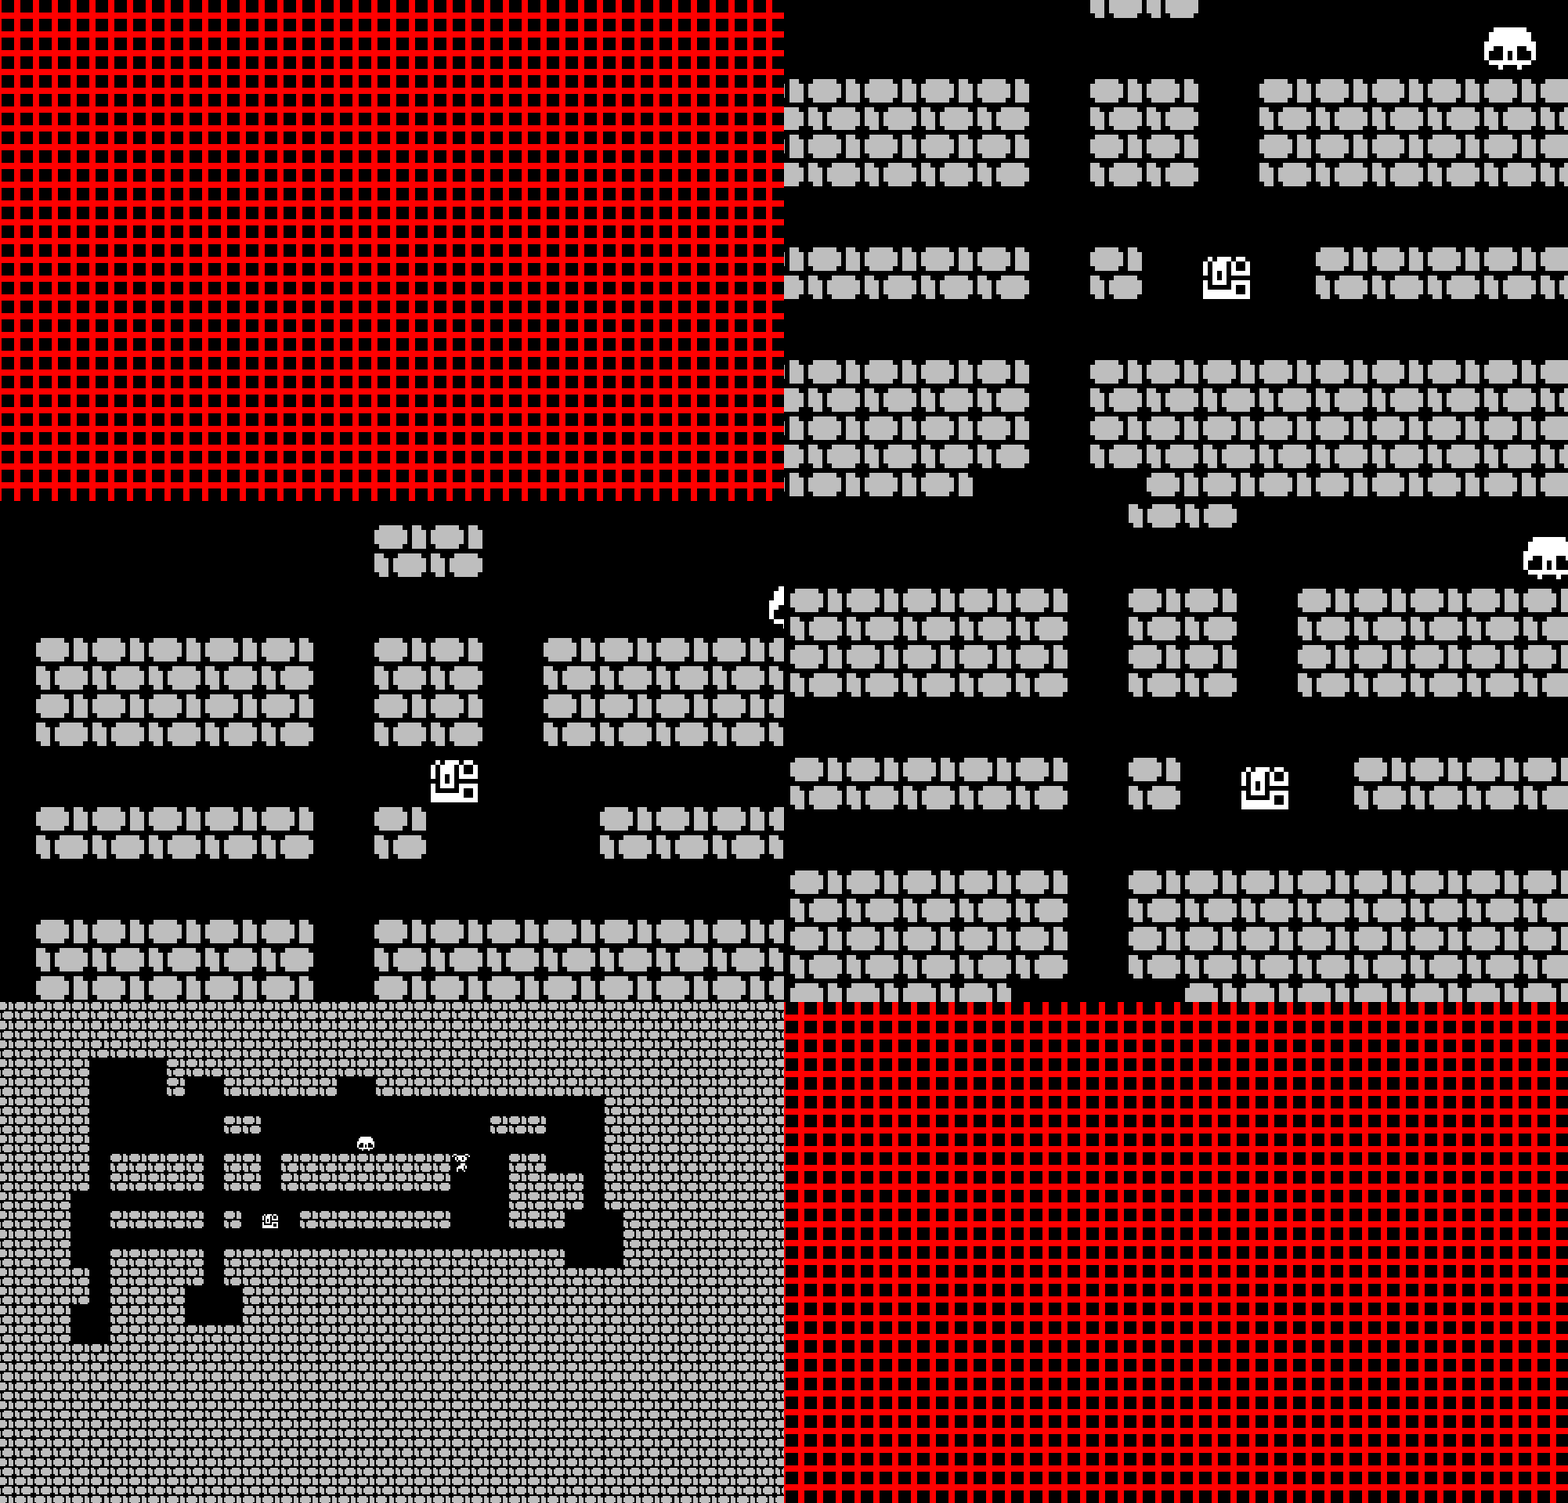
In this example, I start in the debug state, step through the map generation, then swap over to a ‘real’ set of tiles, then finally zoom in by moving into the PLAYING state.
Array of Maps
The result of my procedural generation is expected to be a Map that contains the final state of the procedural generation. My system instead returns many different Maps. The map generator is configured to save and append a Map at each discrete step, then the game is configured to know that only the last one is the ‘true’ map that is to be played. Each of the other maps is only reference while the game is in map gen debug state and the arrow keys allow me to toggle between them. Each of the examples above has shown this in action
Colors and Flavors
The last thing I wanted to set up in my map generation debugger was the ability to see the different generation steps in more detail than what you’d see from the normal map. Specifically, I wanted to see what floor tiles generated as part of the room differently from the floor tiles generated as part of the corridor. I was able to accomplish this by adding a ‘flavor’ property to the tile.
Basically, when the TileRenderMap renders a tile, it uses the ‘name’ property of the TileType (i.e. ‘floor’ or ‘wall’) to pull in the sprite and color. I use the ‘flavor’ as an optional tag that the TileRenderMap can use to adjust the sprite and color for different tiles that share a TileType.
# default tile render map
var render_color_mapping = {
	"floor": Color.BLACK,
}

# debug tile render map
var render_color_mapping = {
	"floor": Color.BLUE,
	"floor-corridor": Color.YELLOW,
}
When I generate the map, I add a ‘corridor’ flavor to the corridor tiles. When the default tile render map handles the tile, it ignores the corridor tag and renders all the floor tiles black. When in debug mode, I switch to the debug render map, and since ‘floor-corridor’ is an available mapping, I can render that in yellow while the room tiles render in blue.
I think this will be exceptionally helpful when I bring in more complicated tiles and more complicated procedural generation
Final Notes and What’s Next
Thank you for reading! I was very happy to get map generation and debugging to a solid spot. I also extended my unit testing and it helped me identify a few areas where I could improve my code or add some qualifiers to some important functions. The next feature I want to add is some basic external file loading, specifically for the tile render mappings. Those resource files will get complex as more and more tiles are added and I don’t want to deal with that later. The next significant feature for the game will be eating/inventory/items. This feature kinda represents the core of my vision for the game; working on it is kinda daunting.
I may take a short jaunt into a game jam next month; I haven’t really decided. I have an interesting idea in mind. If I do, you’ll hear about that later, otherwise, you’ll hear about the inventory system.
Take care!
nuzcraft
